

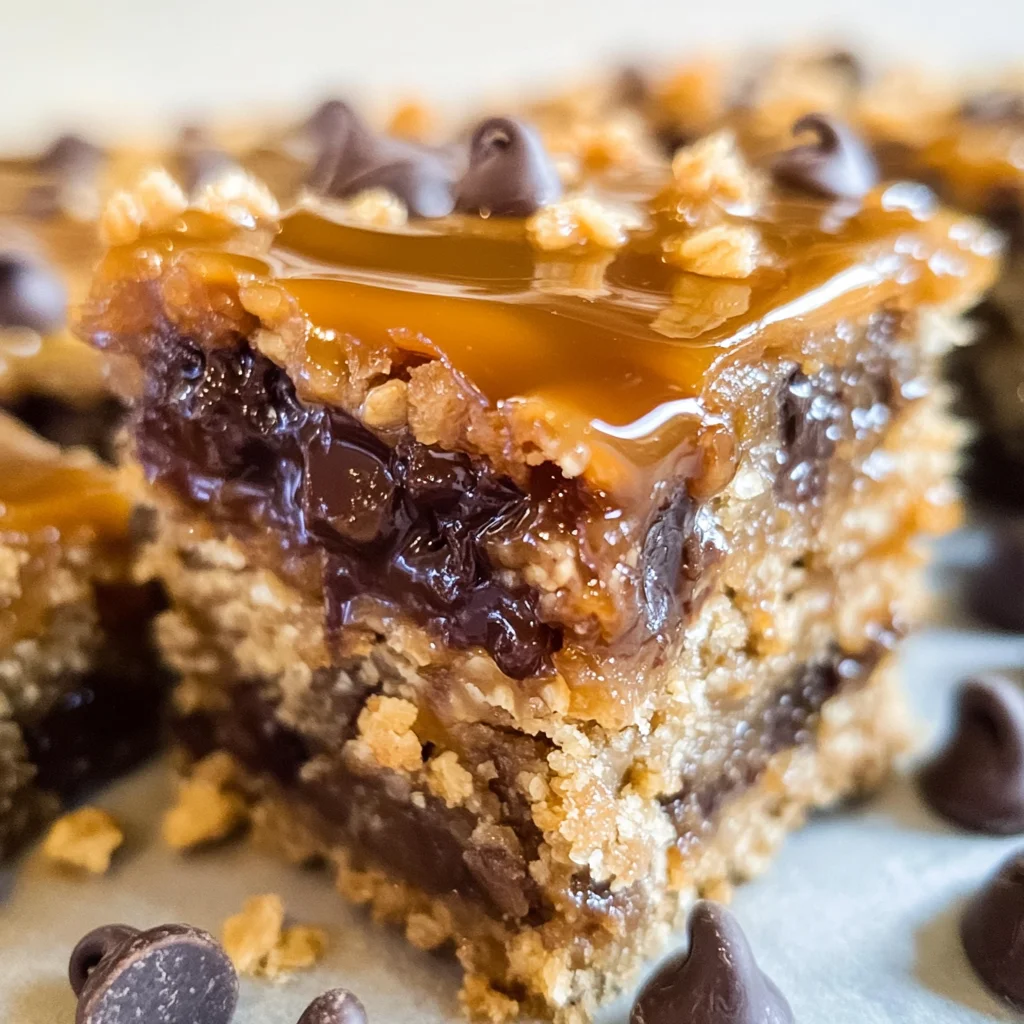
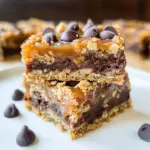
🎉🧡😋 For the serious caramel lover, these soft and chewy bars are dripping with caramel and stuffed with chocolate! Easy one-bowl, no-mixer recipe! Carmelitas are perfect for satisfying your sweet tooth at any occasion, whether it’s a family gathering, party, or a cozy night in. Their rich flavors and delightful textures make them an irresistible treat.
Why You’ll Love This Recipe
- Quick and Easy: With just a few simple steps, you can whip up these delicious bars without any fuss.
- Chewy Texture: The combination of oats and caramel creates a soft, chewy experience that is simply divine.
- Versatile Treat: Enjoy them as a dessert after dinner or serve them at parties; they’re sure to impress!
- Decadent Flavor: The blend of chocolate and caramel is a classic that never goes out of style.
- Crowd-Pleaser: These bars are loved by both kids and adults alike, making them perfect for any gathering.
Tools and Preparation
Gathering the right tools will make your baking experience smooth and enjoyable. Here are some essentials you’ll need to create the perfect Carmelitas.
Essential Tools and Equipment
- 8×8-inch baking pan
- Aluminum foil
- Cooking spray
- Microwave-safe mixing bowl
- Whisk
- Spatula
Importance of Each Tool
- Baking Pan: A sturdy pan ensures even cooking and helps shape your Carmelitas perfectly.
- Aluminum Foil: Lining the pan with foil makes cleanup a breeze, especially with sticky caramel.
- Microwave-Safe Mixing Bowl: Ideal for melting butter and caramels quickly without hassle.
- Spatula: Useful for smoothing layers and serving the finished bars cleanly.
Ingredients
For the Carmelitas Base
- 3/4 cup butter (melted)
- 3/4 cup light brown sugar (packed)
- 1 tablespoon vanilla extract
- 1 cup all-purpose flour
- 1 cup whole-rolled old fashioned oats (not instant or quick cook)
- 1 teaspoon baking soda
- 1/2 teaspoon salt (or to taste)
For the Caramel Layer
- 35 caramel squares
- 1/2 cup heavy cream
For the Topping
- 1 cup semi-sweet chocolate chips or chunks
How to Make Carmelitas
Step 1: Preheat the Oven
Preheat your oven to 350°F (175°C). Line an 8×8-inch baking pan with aluminum foil and spray it with cooking spray for easy removal later.
Step 2: Melt the Butter
In a large microwave-safe mixing bowl, add the melted butter. Heat it on high power for about 90 seconds until fully melted.
Step 3: Mix in Sugar and Vanilla
Add the brown sugar and vanilla extract to the melted butter. Whisk until smooth and well combined.
Step 4: Combine Dry Ingredients
Stir in the flour, oats, baking soda, and optional pinch of salt. Mix until fully combined; expect a thick mixture.
Step 5: Prepare the Base Layer
Take half of the mixture (eyeball it) and spread it evenly in the prepared baking pan using a spatula.
Step 6: Bake Base Layer
Bake in preheated oven for about 10 minutes. While this bakes, prepare your caramel sauce.
Step 7: Make Caramel Sauce
In another microwave-safe bowl, combine caramel squares with heavy cream. Heat in high-power bursts of 60 seconds while stirring after each burst until smooth—this should take around 4 to 5 minutes total.
Step 8: Add Chocolate
After removing from the oven, sprinkle chocolate chips evenly over the partially baked base layer.
Step 9: Pour Caramel Sauce
Gradually pour your melted caramel sauce over the chocolate chips ensuring even coverage.
Step 10: Crumble Remaining Mixture
Crumble the remaining oatmeal-brown sugar mixture over the top of everything you’ve layered so far.
Step 11: Final Bake
Return your pan to the oven. Bake for an additional 15 to 18 minutes until edges are lightly browned and center is bubbling slightly.
Step 12: Cool Before Serving
Allow bars to cool completely in their pan before slicing. This could take up to four hours or overnight at room temperature. If you’re in a hurry, place them in the fridge covered with foil to avoid unwanted odors. Cutting too soon may result in messy slices!
Enjoy these delectable Carmelitas as a delightful dessert that will surely become a favorite!
How to Serve Carmelitas
Carmelitas are delightful bars that can be served in various ways to enhance their deliciousness. Whether for a party, a cozy gathering, or simply a treat at home, these chewy bars are sure to impress.
Serve Warm
- Serving warm allows the caramel to remain gooey and melty, making each bite extra indulgent.
With Ice Cream
- Pairing Carmelitas with a scoop of vanilla or chocolate ice cream creates a perfect contrast of temperatures and textures.
Drizzled with Chocolate Sauce
- A light drizzle of chocolate sauce on top adds an extra layer of sweetness and elegance, enhancing the overall presentation.
Topped with Whipped Cream
- Adding a dollop of whipped cream gives a creamy element that complements the chewy texture of the bars beautifully.
With Fresh Fruit
- Slices of strawberries or raspberries provide a refreshing burst that balances the rich caramel flavors.
How to Perfect Carmelitas
To achieve the ultimate Carmelitas, consider these simple yet effective tips for perfecting your baking technique.
-
Use Quality Ingredients: High-quality butter and chocolate make a significant difference in flavor. Opt for good brands to elevate your bars.
-
Don’t Rush Cooling: Allowing the bars to cool completely before slicing is crucial. This helps the caramel firm up for clean cuts.
-
Adjust Saltiness: A pinch of salt can enhance sweetness. Taste your mixture before baking to find the right balance for your preference.
-
Experiment with Mix-ins: Feel free to add nuts or different types of chocolate chips for variety and added texture in your Carmelitas.
-
Check Oven Temperature: Ovens can vary in temperature. Use an oven thermometer to ensure accuracy for perfect baking results.
Best Side Dishes for Carmelitas
Carmelitas pair wonderfully with various side dishes that complement their rich flavors. Here are some great options you might consider serving alongside them:
-
Fresh Fruit Salad: A mix of seasonal fruits provides a refreshing contrast and balances the sweet richness of Carmelitas.
-
Creamy Yogurt Parfait: Layer yogurt with granola and berries for a healthy yet indulgent pairing that offers texture and flavor variety.
-
Cheese Platter: Include mild cheeses like brie or gouda, which can enhance the sweetness while adding savory notes.
-
Chocolate Fondue: Dip fruit or cookies into warm chocolate fondue as an interactive dessert option that pairs perfectly with Carmelitas.
-
Nut Mix: A selection of roasted nuts adds crunch and is an easy snack option to enjoy alongside your bars.
-
Coffee or Tea: Serving Carmelitas with a cup of coffee or tea provides warmth and enhances the dessert experience without overpowering it.
Common Mistakes to Avoid
When making Carmelitas, it’s important to steer clear of common pitfalls that can affect the texture and flavor.
- Incorrect baking time: Baking for too long can dry out your Carmelitas. Keep an eye on them; they should be lightly browned around the edges and bubbling in the center.
- Not cooling completely: Allowing the bars to cool completely is crucial. If you cut them too soon, they will fall apart and become a sticky mess.
- Using the wrong oats: Make sure to use whole-rolled old-fashioned oats, as quick-cook or instant oats won’t provide the right texture for your Carmelitas.
- Over-melting caramel: Melting the caramel too much can make it too runny. Heat it just until smooth for a perfect drizzle over the chocolate.
- Skipping lining the pan: Not lining your baking pan with foil can lead to a sticky cleanup. Always line it for easier removal of your Carmelitas.
Refrigerator Storage
- Store in an airtight container.
- They will last up to 1 week in the refrigerator.
- Ensure they are completely cooled before storing.
Freezing Carmelitas
- Wrap individual bars tightly in plastic wrap, then place them in a freezer-safe bag.
- They can be frozen for up to 3 months.
- Thaw in the refrigerator overnight when ready to eat.
Reheating Carmelitas
- Oven: Preheat to 350F and warm for about 10 minutes until soft.
- Microwave: Heat in 10-second intervals, checking frequently to avoid overheating.
- Stovetop: Place in a covered pan over low heat for a few minutes until warmed through.
Frequently Asked Questions
What are Carmelitas?
Carmelitas are delicious dessert bars made with layers of oatmeal cookie dough, gooey caramel, and chocolate. They offer a delightful combination of flavors and textures.
How do I make Carmelitas gluten-free?
To make gluten-free Carmelitas, simply substitute all-purpose flour with gluten-free flour blend while keeping other ingredients unchanged.
Can I customize my Carmelitas?
Absolutely! You can add nuts, different types of chocolate, or even sprinkle sea salt on top before baking for added flavor.
How do I store leftover Carmelitas?
Leftover Carmelitas should be stored in an airtight container in the refrigerator, where they will stay fresh for about a week.
Can I make Carmelitas ahead of time?
Yes! You can prepare them ahead of time and store them in the refrigerator or freezer. Just remember to let them cool completely before storage.
Final Thoughts
These Carmelitas are an irresistible treat that combines chewy oatmeal cookie dough with rich caramel and chocolate. Perfect for parties or just as a sweet indulgence at home, you can easily customize them with your favorite mix-ins. Give this recipe a try; you won’t be disappointed!
Carmelitas
- Total Time: 43 minutes
- Yield: Approximately 16 servings 1x
Description
Indulge in the delectable world of Carmelitas, a delightful treat that perfectly marries chewy oatmeal cookie layers with rich caramel and luscious chocolate. These bars are not only quick and easy to prepare but also irresistibly satisfying, making them ideal for any occasion—be it a family gathering, a cozy night in, or a fun party. With their soft texture and decadent flavors, Carmelitas are sure to impress everyone from kids to adults. Enjoy them warm for that gooey caramel experience or serve them chilled for a refreshing bite. Whatever way you choose, these bars will quickly become a favorite in your dessert repertoire!
Ingredients
- 3/4 cup melted butter
- 3/4 cup packed light brown sugar
- 1 tablespoon vanilla extract
- 1 cup all-purpose flour
- 1 cup whole-rolled old-fashioned oats
- 1 teaspoon baking soda
- 1/2 teaspoon salt (optional)
- 35 caramel squares
- 1/2 cup heavy cream
- 1 cup semi-sweet chocolate chips
Instructions
- Preheat your oven to 350°F (175°C). Line an 8×8-inch baking pan with aluminum foil and spray with cooking spray.
- In a microwave-safe bowl, melt the butter. Add brown sugar and vanilla; whisk until smooth.
- Stir in flour, oats, baking soda, and optional salt until combined.
- Spread half of the mixture into the prepared pan and bake for 10 minutes.
- Meanwhile, melt caramel squares with heavy cream in the microwave until smooth.
- Remove the pan from the oven; sprinkle with chocolate chips and pour melted caramel over the top.
- Crumble remaining mixture over everything and return to the oven for an additional 15-18 minutes until golden.
- Allow to cool completely before slicing.
- Prep Time: 15 minutes
- Cook Time: 28 minutes
- Category: Dessert
- Method: Baking
- Cuisine: American
Nutrition
- Serving Size: 1 serving
- Calories: 205
- Sugar: 14g
- Sodium: 129mg
- Fat: 10g
- Saturated Fat: 6g
- Unsaturated Fat: 4g
- Trans Fat: 0g
- Carbohydrates: 27g
- Fiber: 1g
- Protein: 2g
- Cholesterol: 30mg